Split stitch
Also known as Kensington outline stitch
A fine, smooth line in which each stitch comes up through the middle of the one before, splitting its strands. It looks like a tiny chain, and it is the classic hidden edge under satin and long and short stitch.
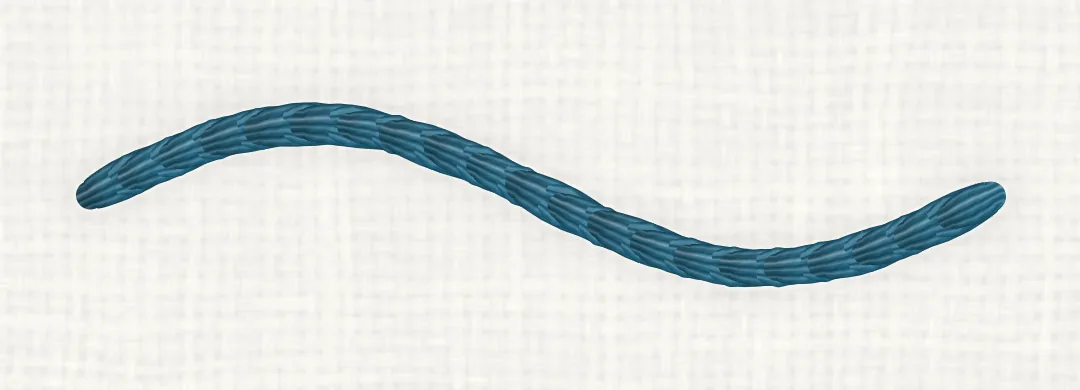
Quick facts
- Type
- Line stitch
- Best for
- Fine lines, Lettering, Edges under satin and long and short
- Difficulty
- Beginner (1 of 3)
- Strands
- 2 or 4: an even number splits evenly down the middle (of six-strand floss)
- Needle
- Embroidery (crewel) needle, size 7–9
- Stitch length
- 3–4 mm (about 1/8 in); about 3 mm (1/8 in) as an edge under a fill
- On curves
- Good, with shorter stitches on tight curves
- Related
- Stem stitch, Backstitch, Satin stitch, Long and short stitch
Step by step
Shown right-handed, worked from left to right with the stab method in a hoop: each stitch comes up from below, through the thread of the one before.
First stitch, then up through it
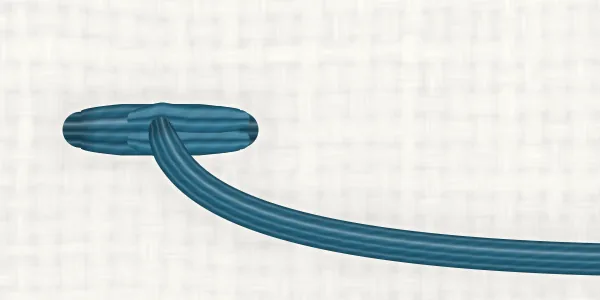
Bring the needle up at 1, at the start of the line, and take it down at 2, a stitch length of 3–4 mm (about 1/8 in) along. Bring it back up at 3, halfway between 1 and 2, right through the middle of the stitch, so the needle parts its strands.
Second stitch
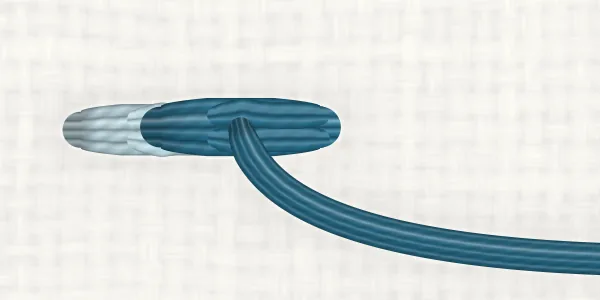
Take the needle down at 4, half a stitch length past 2. Come up at 5, in the same hole as 2, through the middle of the second stitch.
Keep going
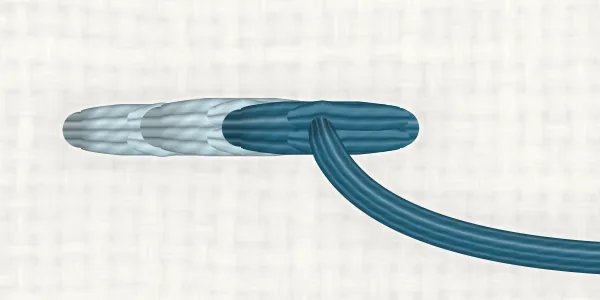
Repeat: take the needle down half a stitch length past 4 (6), then bring it up at 7, through the middle of the stitch you just made, in the same hole as 4.
Finish the line
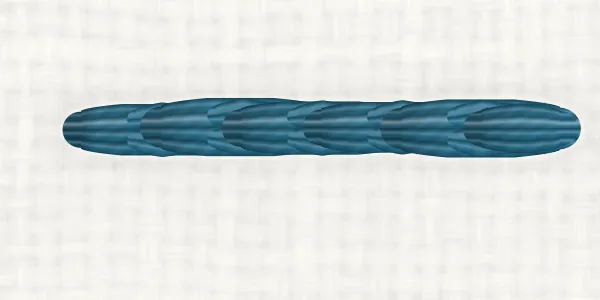
End with a half-length stitch into the end of the line, then take the thread to the back and weave it under the stitches there.
Shown left-handed, worked from right to left with the stab method in a hoop. The pictures are the right-handed ones turned half a turn, so the stitch is exactly the same.
Tips
- Split from below: bring the needle up through the stitch. Going down through it from above is a different stitch, split backstitch, with a different back.
- Use an even number of strands, so the needle parts them evenly: 2 strands split 1 and 1, 4 split 2 and 2. Soft threads split most easily.
- Aim for the middle of the stitch every time: an off-centre split makes the line wobble.
- As an edge under satin or long and short stitch, outline the shape in split stitch about 3 mm (1/8 in) long, then bring the fill stitches down just outside it: the edge comes out crisp and slightly raised.
- Shorten the stitches on tight curves, to about 2 mm (1/16 in), so the line stays smooth.
- With the sewing method (fabric in your hand or a loose hoop), take the needle in at each even number and out at the next odd number, through the stitch, in one movement.
Common mistakes
A twisted rope instead of a fine chain
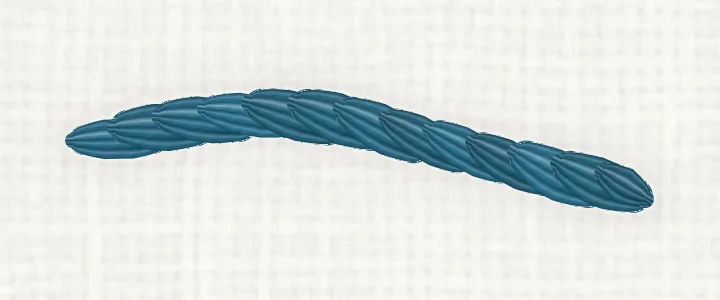
Looks like: The line twists like a rope and looks wider than split stitch should.
Why it happens: The needle came up beside the last stitch instead of through it: that makes stem stitch.
Fix: Bring the needle up through the middle of the stitch, parting its strands.
Off-centre splits
Looks like: The line wobbles, and some stitches look thinner than others.
Why it happens: The needle came up near the edge of the stitch, catching only a strand or two.
Fix: Aim for the middle. With an even number of strands it is easy to see.
The back of the work
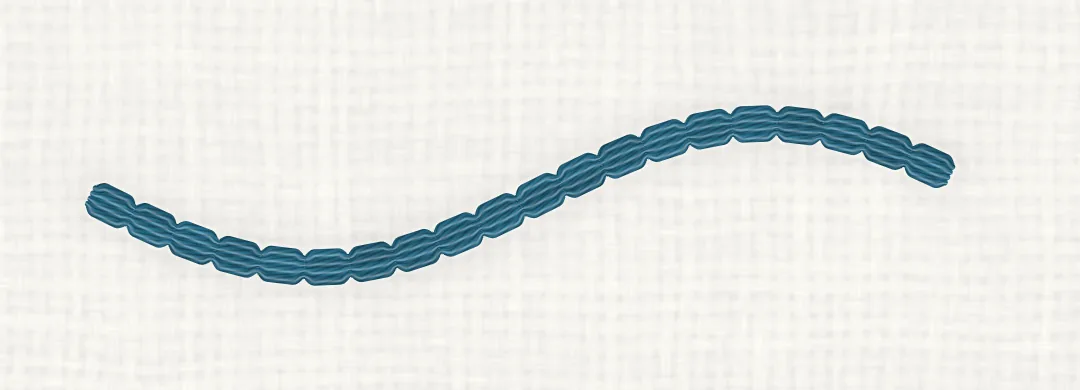
The back of split stitch is a line of small backstitches, each half a stitch long, meeting end to end. It is the same as the back of stem stitch, because the two use the same holes in the same order.
Variations
- Split backstitch: The needle goes down through the last stitch from above instead of coming up through it. It looks much the same from the front but has a different back.
- Split stitch filling: Rows of split stitch worked close together fill a shape with a smooth, fine texture.
Compare
Both use the same holes. Use split stitch for a fine, flat line and for edges under fills; use stem stitch for a rope-like line on flowing curves. Stem stitch
Use split stitch for a smooth, continuous line with no visible joins; use backstitch for crisp lines that are quicker to keep even. Backstitch
Stem stitch vs split stitch, side by side
In a Hoopsake pattern
Hoopsake turns your photo into a hand-embroidery pattern with a real stitch plan: it chooses a stitch such as split stitch for every line, matches each colour to a DMC thread and gives you a guide to print. Make a pattern from a photo
Names and history
Split stitch is also called Kensington outline stitch; don't confuse it with South Kensington stitch, which is stem stitch. In opus anglicanum, the medieval English embroidery, it was used to fill faces in fine, smooth rows. Stitch dictionaries file it in different families: some with backstitch, others with stem stitch.
Questions
How many strands should I use for split stitch?
An even number, so the needle parts them evenly: two strands for a fine line, four for a bolder one.
Split stitch or backstitch for an outline?
Split stitch gives a smoother line with no visible joins; backstitch is crisper and easier to keep even. Under satin stitch, split stitch makes the better edge: crisp and slightly raised.
What is the difference between split stitch and stem stitch?
They use the same holes in the same order. In split stitch the needle comes up through the last stitch, making a fine, flat chain; in stem stitch it comes up beside it, making a twisted rope.
Why does my split stitch look messy?
Usually the needle is catching the thread off-centre, or the thread does not split cleanly. Use an even number of strands and aim for the middle of each stitch.