Satin stitch
Also known as Damask stitch, Flat stitch, Long stitch
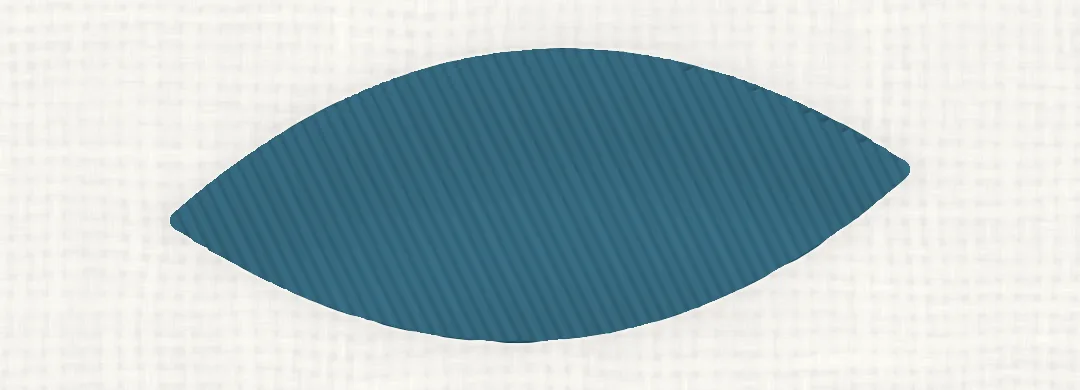
Straight stitches laid side by side across a shape, edge to edge, so they cover it with smooth, shiny thread. It is best for small shapes: leaves, petals, dots and letters.
Quick facts
- Type
- Filling stitch
- Best for
- Small shapes, Leaves and petals, Filled letters
- Difficulty
- Easy with practice (2 of 3)
- Strands
- 1–2 for the smoothest finish (the pictures use 2) (of six-strand floss)
- Needle
- Embroidery (crewel) needle, size 8–10
- Stitch length
- Edge to edge across shapes up to about 10 mm (3/8 in) wide
- On curves
- Follows curved edges; turn the stitch angle gradually round a curve
- Related
- Long and short stitch, Split stitch
Step by step
Shown right-handed, with the stab method in a hoop: from the middle out to the right-hand end, then back to fill the left half.
Edge the shape
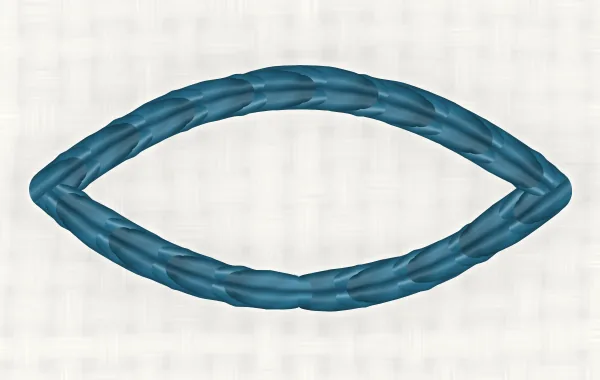
Outline the shape in split stitch, with small stitches about 2 mm (1/16 in) long. The edge keeps the satin crisp and lifts it slightly.
First stitch across the middle
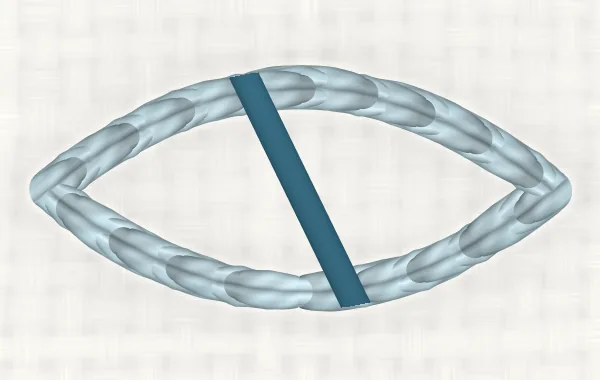
Bring the needle up at 1, just outside the split-stitch edge, and take it down at 2, just outside the edge on the other side, at the angle you want the whole fill to take. Starting in the middle sets the angle.
Lay the next stitch beside it
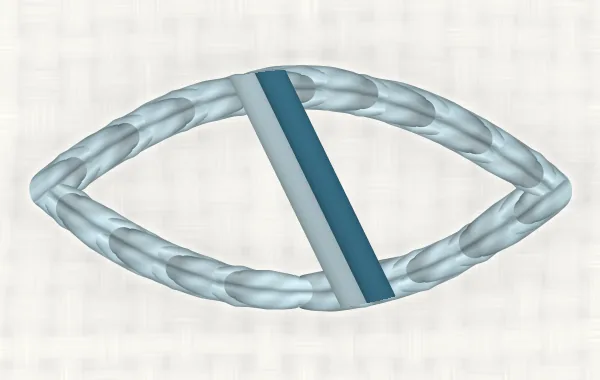
Come up at 3, right beside 1, on the same side, and go down at 4, right beside 2. The stitches should touch without overlapping.
Fill one half
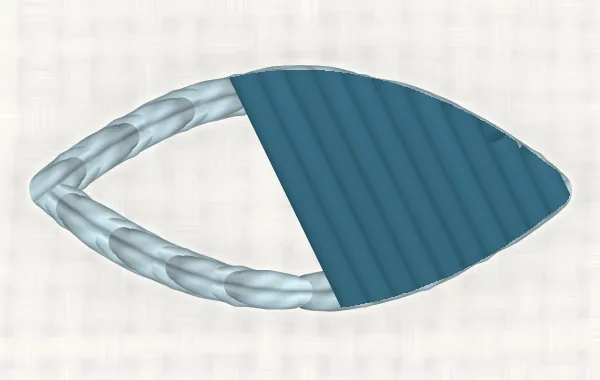
Keep going to one end of the shape, each stitch parallel to the first and coming up on the same side.
Fill the other half
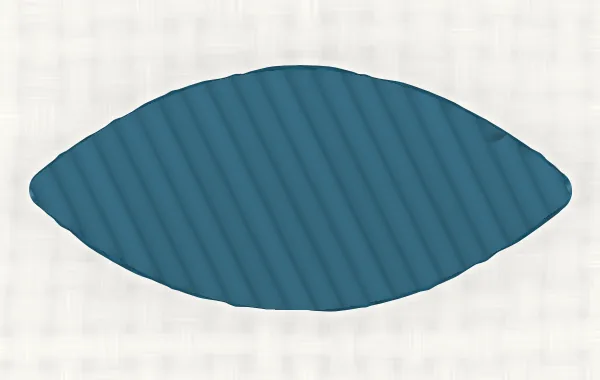
Go back to the middle and fill the other half the same way, to the far end. Secure the thread under the stitches on the back.
Shown left-handed, with the stab method in a hoop: from the middle out to the left-hand end, then back to fill the right half. The pictures are the right-handed ones turned half a turn.
Tips
- Keep satin for small shapes: long stitches loosen and snag. No hand-embroidery source we checked gives a limit; we suggest about 10 mm (3/8 in) across, and long and short stitch for anything bigger.
- Start in the middle at the angle you want and work out to each end: the first stitch sets the direction for all the rest.
- Come up on the same side every time, so the back is covered too; it keeps the surface smooth and even.
- Keep the fabric taut in a hoop: too tight puckers when you take it out, too slack lets the stitches sag.
- For a raised look, pad the shape first with split stitch or a few straight stitches, then satin over them.
- Sources differ on the edge: some skip it. We recommend a split-stitch edge, especially while you learn.
Common mistakes
Gaps between stitches
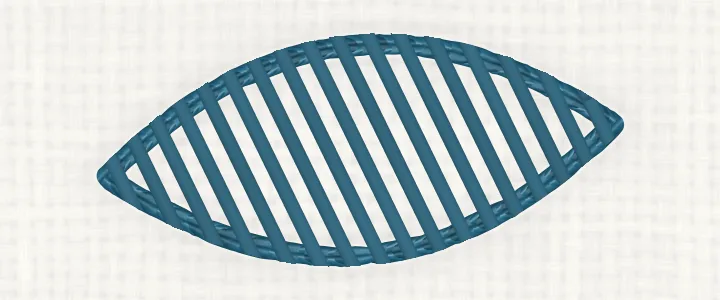
Looks like: The fabric shows between the stitches.
Why it happens: The stitches were laid too far apart.
Fix: Lay each stitch right beside the last, touching it. On coarse fabric, use another strand.
A ragged edge
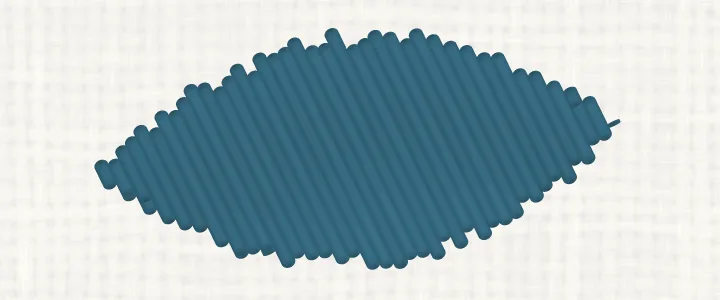
Looks like: The edge is uneven: some stitches stop short of the line and others poke past it.
Why it happens: No edge was stitched first, and each stitch went in a little off the line.
Fix: Outline in split stitch first, and take every stitch down just outside it.
Loose, snagging stitches
Looks like: Long stitches sag and catch on things.
Why it happens: The shape is too wide for satin stitch.
Fix: Split the shape into smaller sections, or fill it in long and short stitch.
The back of the work
Satin stitch looks almost the same on the back as on the front: because each stitch comes back up on the same side, the thread crosses the back edge to edge too.
Variations
- Padded satin stitch: Satin over a padding of split or straight stitches, for a raised, rounded shape.
- Encroaching satin stitch: Rows of satin, each overlapping the one before a little, to cover larger shapes.
- Long and short stitch: For shapes too big for satin, or to blend colours.
Compare
Use satin stitch for small shapes in one smooth colour; use long and short stitch for large shapes and for blending shades. Long and short stitch
Satin stitch vs long and short stitch, side by side
In a Hoopsake pattern
Hoopsake turns your photo into a hand-embroidery pattern with a real stitch plan: it chooses a stitch such as satin stitch for every line, matches each colour to a DMC thread and gives you a guide to print. Make a pattern from a photo
Names and history
Satin stitch is also known as damask stitch, flat stitch and long stitch, and as point passé and plumetis. Machine embroidery has a "satin stitch" too, a dense zigzag column; the hand stitch is straight stitches laid side by side.
Questions
How do I stop gaps in satin stitch?
Lay each stitch right beside the last so they touch, and use a hoop so the fabric stays taut.
How wide can satin stitch be?
We suggest up to about 10 mm (3/8 in) across. Wider, the stitches loosen and snag: split the shape or use long and short stitch.
Do I need an outline before satin stitch?
Not always, but a split-stitch edge gives a much crisper result and is the easiest way to a neat edge.
Why is my satin stitch puckering?
The stitches are pulled too tight, or the fabric was not taut in the hoop. Lay each stitch flat without tugging.