Long and short stitch
Also known as Silk shading, Shading stitch, Needle painting
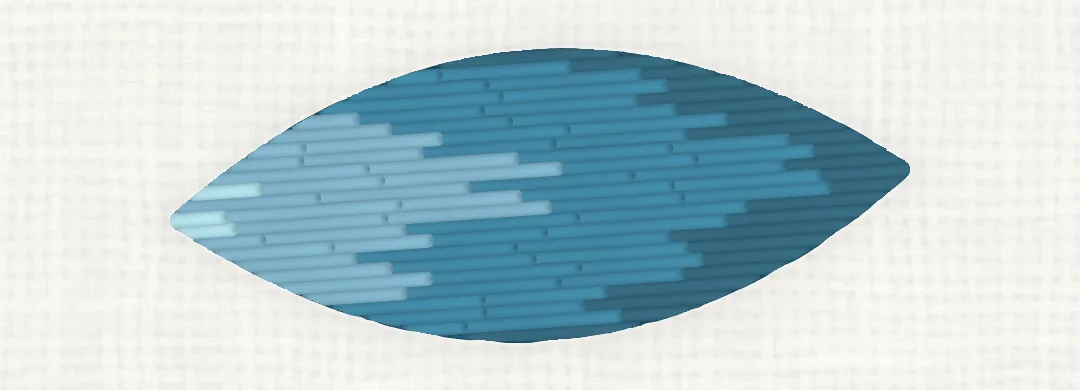
Rows of staggered straight stitches, each row coming up into the one before, so a shape fills smoothly and colours blend from one shade to the next. It fills shapes too big for satin stitch.
Quick facts
- Type
- Filling stitch
- Best for
- Large shapes, Blending colours, Shading
- Difficulty
- Takes practice (3 of 3)
- Strands
- 1 for the finest shading; 2 is easier while you learn (the pictures use 2) (of six-strand floss)
- Needle
- Embroidery (crewel) needle, size 9–10
- Stitch length
- First-row stitches about 10 mm (3/8 in), varied; later rows a little shorter
- On curves
- Follows curving shapes when the stitch direction follows the form
- Related
- Satin stitch, Split stitch
Step by step
Shown right-handed, with the stab method in a hoop: row by row from one end of the shape to the other, each row a shade lighter.
Edge the shape
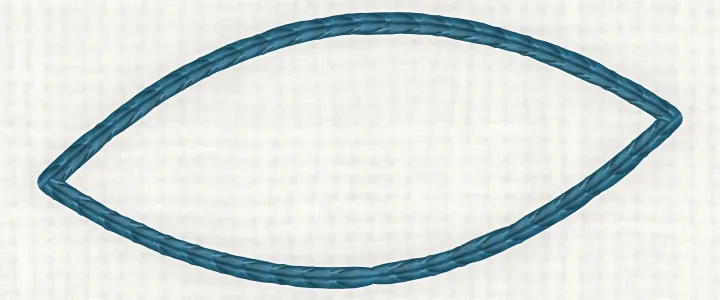
Outline the shape in split stitch, with small stitches about 2 mm (1/16 in) long. On a curving shape, draw a few guide lines for the stitch direction.
First row
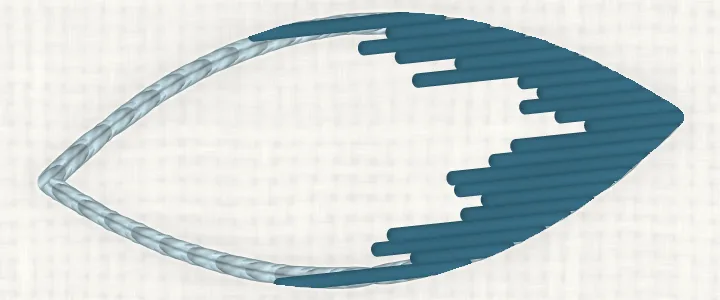
Starting at one end, bring the needle up at 1, inside the shape, and take it down at 2, just over the split-stitch edge. Work along the edge with stitches of different lengths side by side, so the row's inner edge is jagged.
Next row, next shade
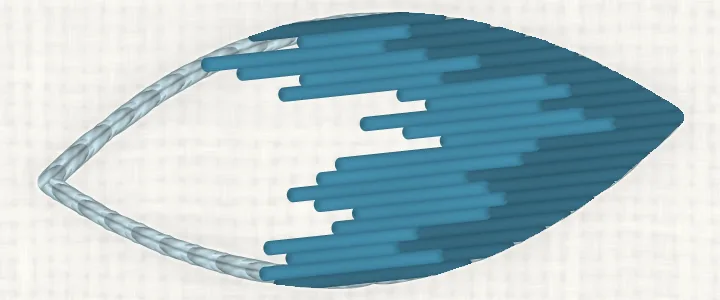
With the next shade, bring the needle up at 1, through the end of a first-row stitch, splitting it, and take it down at 2, further into the shape. Fill along the row so the new stitches reach into the first row and the colours blend.
Finish the shape
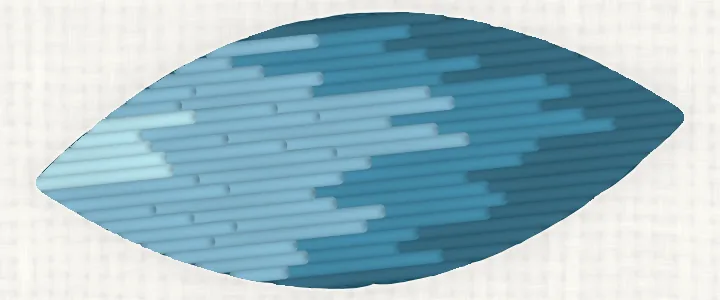
Carry on row by row, each a shade lighter, until the last row comes over the edge at the far end. Keep every stitch to the same direction.
Shown left-handed, with the stab method in a hoop: the right-handed pictures turned half a turn, so you work from the other end.
Tips
- Vary the lengths within every row, so no line forms where one row meets the next.
- Sources differ on the first row: some alternate long and short stitches exactly, then work equal rows into the gaps; others vary the lengths freely. We recommend varied lengths, for a softer blend.
- Sources also differ on later rows: splitting back into the row before (as in the pictures) or fitting between its stitches. Splitting blends more smoothly.
- Work the parts that lie behind first: a petal under another, a leaf behind a stem.
- Let the stitches follow the form (natural shading), or keep every stitch parallel (tapestry shading).
- Use one strand for the finest shading; two is easier while you learn.
Common mistakes
Stripes between rows
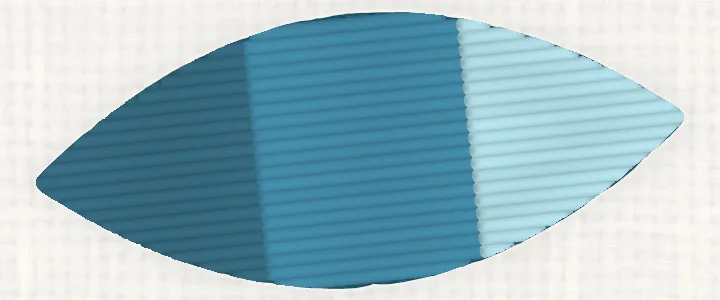
Looks like: Each row ends in a straight line, so the colours sit in hard bands instead of blending.
Why it happens: Every stitch in a row is the same length.
Fix: Vary the lengths so the rows interlock, and split back into the row before.
Gaps between rows
Looks like: Fabric shows where one row meets the next.
Why it happens: The next row started short of the last instead of coming up into it.
Fix: Bring each stitch of the new row up through the end of a stitch in the row before.
Stitches that wander
Looks like: Patches of stitches point different ways and the shape looks untidy.
Why it happens: No guide for the direction on a curving shape.
Fix: Draw a few direction lines on the fabric first and keep to them.
The back of the work
The back is not a copy of the front: it shows short stitches and the thread travelling between them. Which end of each stitch comes up, and how the thread travels, is up to you, so we don't draw it; keep it flat, with no long carries.
Variations
- Natural shading: The stitch direction follows the form, as in the curve of a petal.
- Tapestry shading: Every stitch is parallel, usually upright, and the colours change row by row.
- Satin stitch: For small shapes in a single colour.
Compare
Use long and short stitch for large shapes and blended shades; use satin stitch for small shapes in one smooth colour. Satin stitch
Satin stitch vs long and short stitch, side by side
In a Hoopsake pattern
Hoopsake turns your photo into a hand-embroidery pattern with a real stitch plan: it chooses a stitch such as long and short stitch for every line, matches each colour to a DMC thread and gives you a guide to print. Make a pattern from a photo
Names and history
Also called silk shading, shading stitch and needle painting, and in older books feather stitch or plumage stitch, from the Latin opus plumarium. That old name is easy to confuse with today's feather stitch, a looped line stitch.
Questions
How many strands for long and short stitch?
One strand gives the finest shading; two are easier while you learn.
How long should the stitches be?
About 10 mm (3/8 in) in the first row, varied, and a little shorter in later rows. Smaller shapes need shorter stitches.
How do I blend colours?
Change to the next shade for each row, and bring each new stitch up into the row before so the shades overlap.
Why can I see lines between my rows?
The stitches in a row are too even. Vary their lengths so the rows interlock.