Stem stitch
Also known as Crewel stitch, Stalk stitch, South Kensington stitch
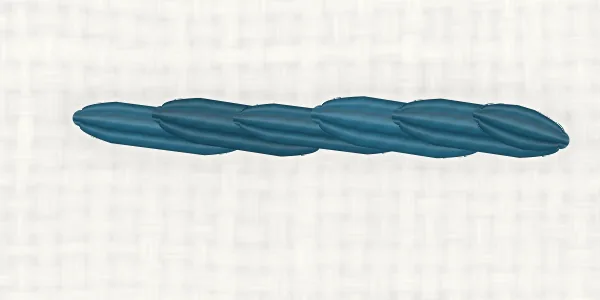
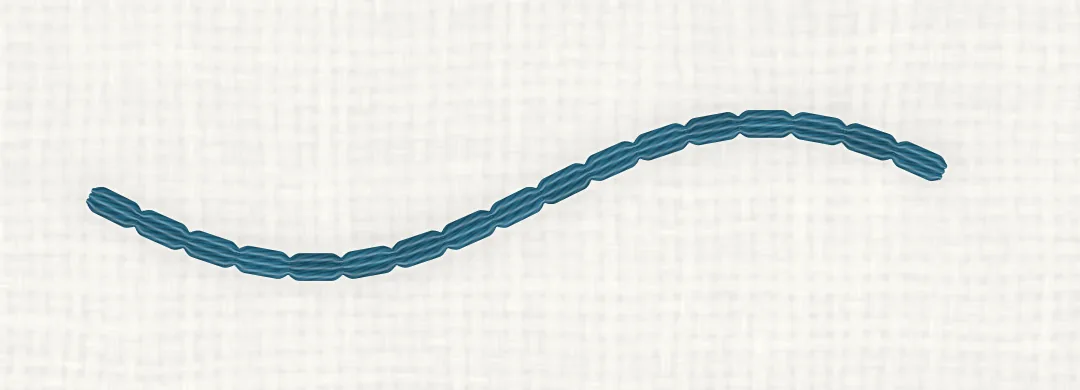
A line of overlapping, slightly slanted stitches that twist together into a smooth rope. It follows curves beautifully, so it is the classic stitch for stems, flowing outlines and script lettering.
The one rule: keep the working thread on the right of the direction you are stitching, and keep it there for the whole line. Working from left to right, that means below the line; from right to left, above it; working upwards, on the right. With the thread on the left instead, you get outline stitch, its mirror image.
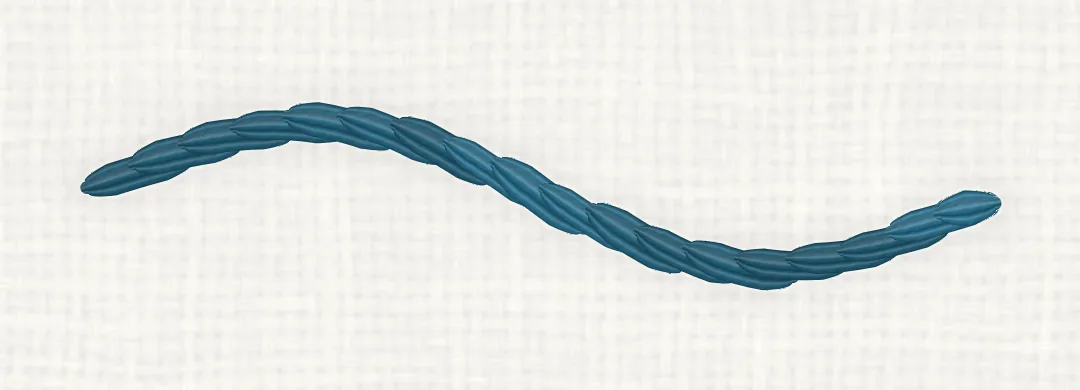
Quick facts
- Type
- Line stitch
- Best for
- Curved outlines, Plant stems, Script lettering
- Difficulty
- Beginner (1 of 3)
- Strands
- 2–3 for most lines; all 6 for a bold, rope-like line (of six-strand floss)
- Needle
- Embroidery (crewel) needle, size 7–8 (size 5 for 6 strands)
- Stitch length
- 3–4 mm (about 1/8 in); about 2 mm (1/16 in) on tight curves
- On curves
- Excellent: one of the smoothest line stitches on curves
- Related
- Backstitch, Split stitch
Step by step
Shown right-handed, worked from left to right with the stab method in a hoop, so the thread stays below the line: on the right of the direction you are stitching.
First stitch, then back up halfway
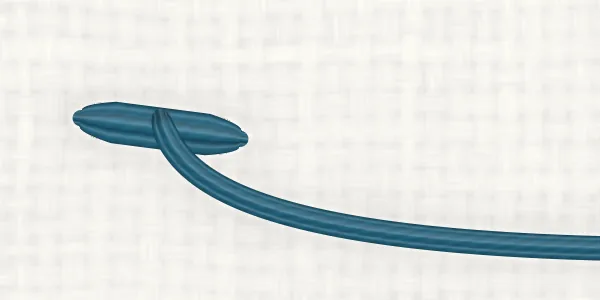
Bring the needle up at 1, at the start of the line, and take it down at 2, a stitch length of 3–4 mm (about 1/8 in) further along, leaving a small loop. Hold the loop below the line with your thumb, bring the needle up at 3, halfway between 1 and 2 and just above the thread, then pull the thread snug.
Second stitch
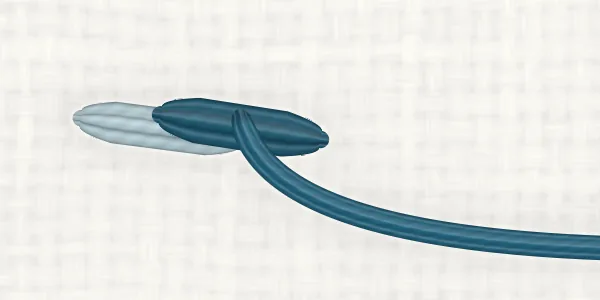
Take the needle down at 4, half a stitch length past 2, again leaving a loop. Holding it below the line, come up at 5, in the same hole as 2, and pull snug. The new stitch lies beside the first, and the two begin to twist together.
Keep going
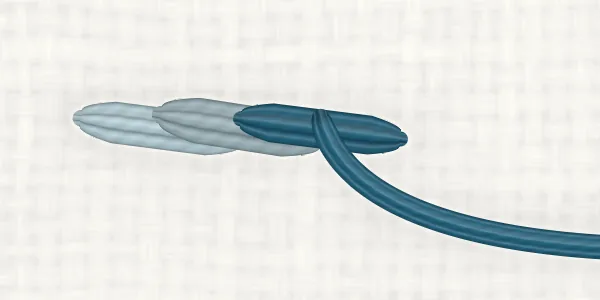
Repeat: take the needle down half a stitch length past 4 (6), then bring it up in the hole at 4 (7), with the thread held below the line every time.
Finish the line
End with a half-length stitch into the end of the line, so the rope keeps its width to the very end. Take the thread to the back and weave it under the stitches there.
Shown left-handed, worked from right to left with the stab method in a hoop, so the thread stays above the line: still on the right of the direction you are stitching. The pictures are the right-handed ones turned half a turn, which keeps the stitch the same; a mirror image would make outline stitch.
Tips
- Keep the thread on the same side for the whole line. Swapping sides partway changes the twist, and the change shows.
- Shorten the stitches on curves, to about 2 mm (1/16 in) on tight ones. Long stitches can't follow a bend and stick out in spikes.
- At a sharp point or corner, end the line there and start a new one from the same hole: stem stitch can't turn a sharp corner neatly.
- With the sewing method (fabric in your hand or a loose hoop), take the needle in at each even number and out at the next odd number in one movement, with the thread below the needle when you work from left to right. There is no loop to hold: keeping the thread below the needle does the same job.
- Sources differ on curves: some keep the thread on the outside of every curve, even switching to outline stitch partway along an S-shape. We recommend keeping to one side for the whole line, so the twist stays even, and turning the hoop as you go.
- The rule is for ordinary S-twisted threads: stranded cotton, perle and most silks. With a Z-twisted thread (some silks and rayons) the rope looks smoothest with the thread on the other side.
Common mistakes
The twist changes partway
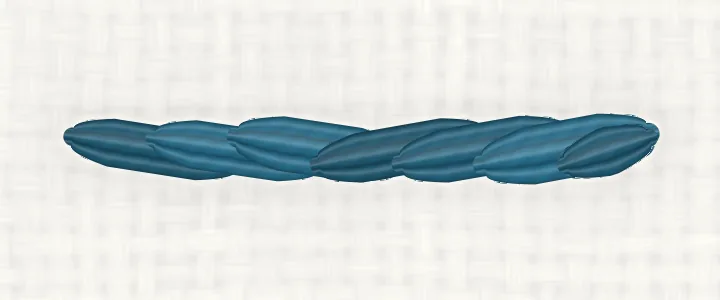
Looks like: Part of the line twists one way and part the other, so the texture changes halfway along.
Why it happens: The thread was below the line for some stitches and above it for others: those stitches are outline stitch.
Fix: Keep the thread on the right of your direction of travel for the whole line.
Spiky curves
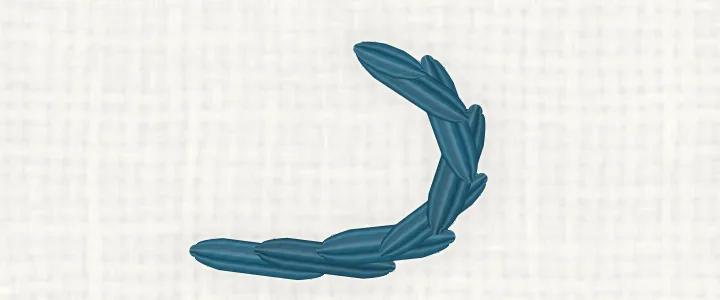
Looks like: On a tight curve the stitches stick out in spikes instead of hugging the line.
Why it happens: The stitches are too long for the curve: each one is a straight thread between its two holes.
Fix: Shorten the stitches as the curve tightens, to about 2 mm (1/16 in).
A flat, chain-like line
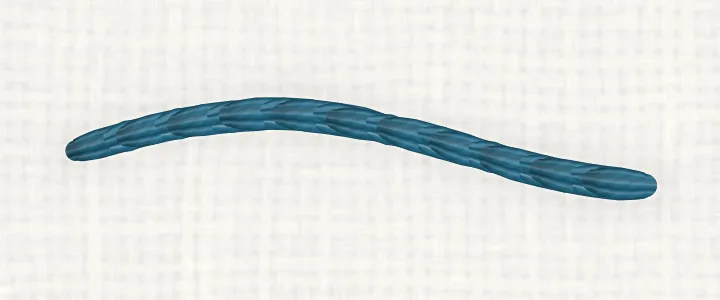
Looks like: The line looks flat, like a fine chain, instead of a twisted rope.
Why it happens: The needle came up through the thread of the last stitch, splitting it, instead of beside it. That makes split stitch.
Fix: Come up just beside the last stitch, on the side away from the working thread.
The back of the work
The back of stem stitch is a line of small, even backstitches, each half a stitch long, meeting end to end. A neat back like this is a good sign that the front is right.
Variations
- Outline stitch: The same movements with the thread on the left of your direction of travel: the stitches slant and twist the other way.
- Whipped stem stitch: A second thread wrapped around the stem stitches, without entering the fabric, smooths the line into a raised cord.
- Stem stitch filling: Rows of stem stitch worked close together, following the shape, fill it with a fine, ridged texture.
Compare
Use stem stitch for flowing curves, stems and script; use backstitch for crisp outlines, sharp corners and small print lettering. Backstitch
Both use the same holes. Use stem stitch for a rope-like line on flowing curves; use split stitch for a fine, flat line and for edges under fills. Split stitch
Stem stitch vs split stitch, side by side
In a Hoopsake pattern
Hoopsake turns your photo into a hand-embroidery pattern with a real stitch plan: it chooses a stitch such as stem stitch for every line, matches each colour to a DMC thread and gives you a guide to print. Make a pattern from a photo
Names and history
Stem stitch is also called crewel stitch, stalk stitch and South Kensington stitch; don't confuse the last with Kensington outline stitch, another name for split stitch. Some references treat "outline stitch" as another name for stem stitch, but most tutorials, and this dictionary, use it for the mirror-image stitch worked with the thread on the other side. In French it is point de tige, in German Stielstich.
Questions
Should the thread be above or below the line?
On the right of the direction you are stitching. Working from left to right, keep it below the line; from right to left, above it; working upwards, on the right. Keep it there for the whole line.
What is the difference between stem stitch and outline stitch?
They are mirror images: the same movements with the thread on opposite sides. The thread on the right of your direction of travel gives stem stitch; on the left it gives outline stitch, whose stitches slant the other way.
How many strands should I use for stem stitch?
Two or three strands for most lines. All six give a bold, rope-like line, and one gives a very fine one.
I'm left-handed. How do I work stem stitch?
Work from right to left with the thread above the line, as in our left-handed diagrams: that is the right-handed method turned half a turn, and it makes the same stitch. A mirror-image diagram would give you outline stitch. With the stab method in a hoop you can also work from left to right like a right-hander, as long as the thread stays below the line.
Is crewel stitch the same as crewelwork?
No. Crewel stitch is another name for stem stitch. Crewelwork is embroidery worked in wool, and a crewel needle is an ordinary embroidery needle with a long eye.