Chain stitch
Also known as Tambour stitch
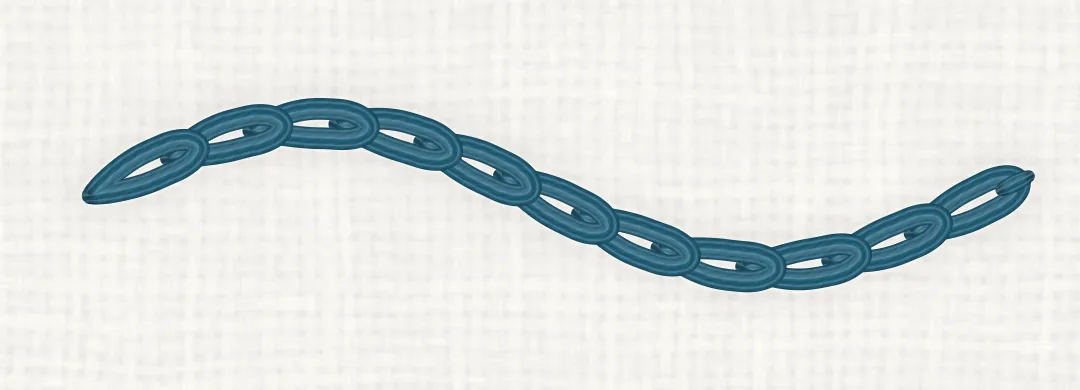
A line of linked loops, each held down by the next. It makes a bold, textured line that follows curves well, and close rows of it can fill a shape.
Quick facts
- Type
- Line stitch
- Best for
- Bold outlines, Curves, Filling in rows
- Difficulty
- Easy with practice (2 of 3)
- Strands
- 2–3; 6 for a heavy line (of six-strand floss)
- Needle
- Embroidery (crewel) needle, size 7–8
- Stitch length
- About 3 mm (1/8 in) per loop; shorter on tight curves
- On curves
- Very good, with slightly shorter loops on tight curves
- Related
- Backstitch, Split stitch, Couching
Step by step
Shown right-handed, worked from left to right with the stab method in a hoop: down and up in separate movements, the loop held while the needle comes up inside it.
Make a loop
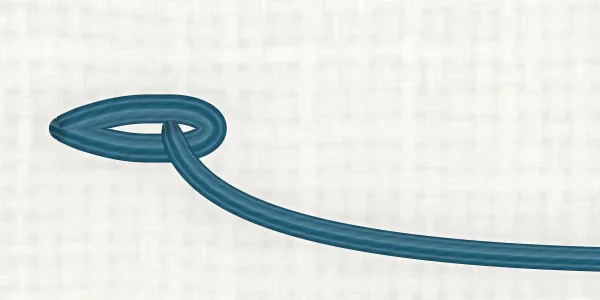
Bring the needle up at 1, at the start of the line, and take it back down at 2, in the same hole, leaving a loop on the front. Come up at 3, a stitch length of about 3 mm (1/8 in) along the line, inside the loop, and pull the loop snug against the thread.
Next link
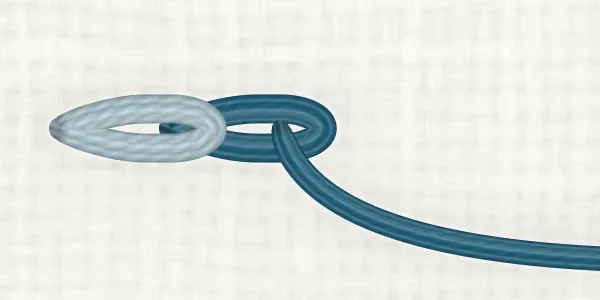
Take the needle down at 4, in the same hole as 3, leaving a new loop. Come up at 5, a stitch length along, inside the new loop, and pull it snug. Each loop is held by the next.
Keep going
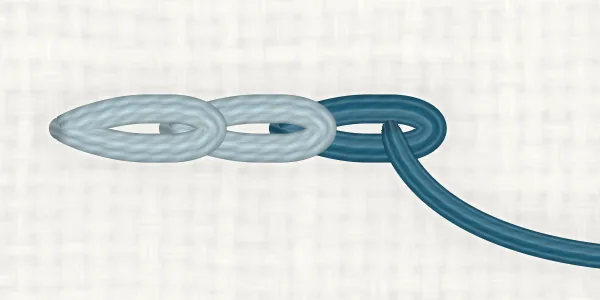
Repeat: down in the hole you came up in (6, with 5), up a stitch length along inside the new loop (7). Keep the loops the same size, snug but not tight.
Finish
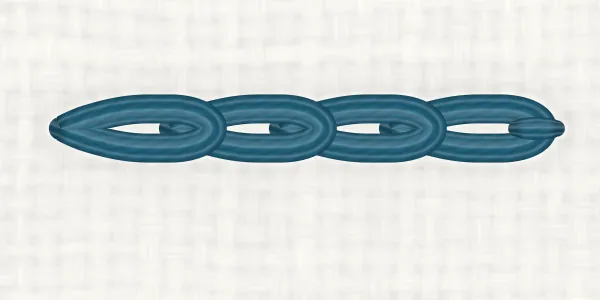
At the end, take the needle down just beyond the last loop, over its end, to make a small holding stitch, and secure the thread on the back.
Shown left-handed, worked from right to left with the stab method in a hoop. The pictures are the right-handed ones turned half a turn, so the stitch is exactly the same.
Tips
- Snug, not tight: tight loops go thin and stiff, loose ones go limp.
- Let the needle dangle now and then so the thread untwists; twisted thread makes uneven loops.
- On curves, make the loops a little shorter so they follow the line.
- To close a ring of chain stitch invisibly, slide the needle under the first loop instead of making a holding stitch, then go down where you came up.
- For a sharp point, make a holding stitch at the point and start again from inside the last loop.
- With the sewing method (fabric in your hand), scoop from the hole you came up in to the next point, with the thread under the needle tip. Sources differ on whether the needle goes down in exactly the same hole or just beside it; we recommend the same hole for the neatest chain.
Common mistakes
Loops pulled too tight
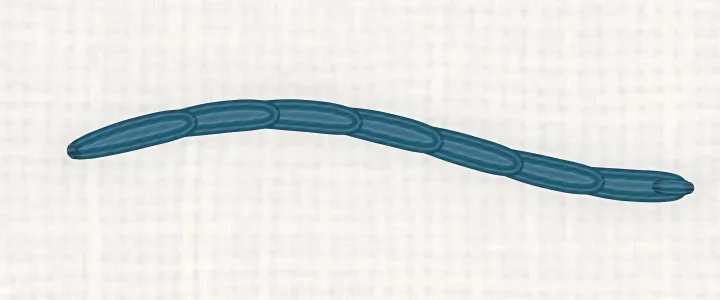
Looks like: The links are thin and pinched, and the line looks stiff.
Why it happens: Each loop was pulled tight before the next one caught it.
Fix: Pull each loop just snug against the thread, so it stays round.
Uneven loops
Looks like: Some links are long and fat, others short and thin.
Why it happens: Uneven stitch lengths, or the thread twisting as you work.
Fix: Keep each stitch the same length, and let the needle dangle to untwist the thread.
The back of the work
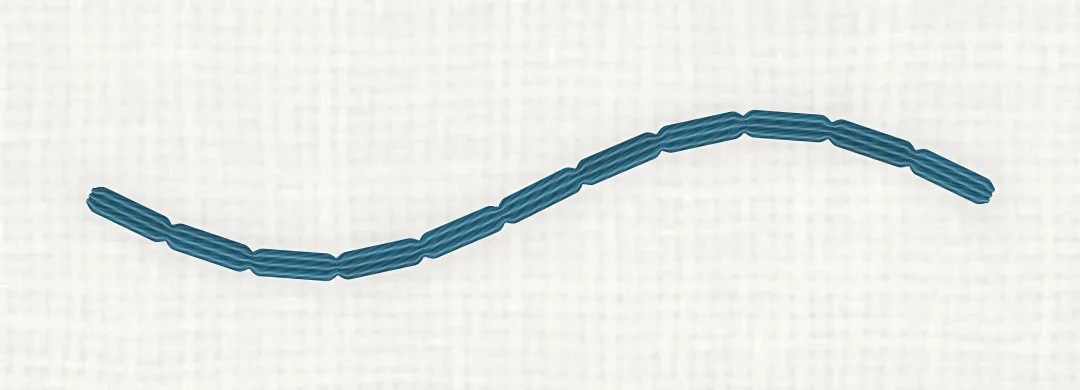
The back of chain stitch is a line of backstitches, one stitch length each: each loop goes down in the hole it came up in, then travels forward underneath to come up inside it.
Variations
- Detached chain (lazy daisy): A single loop held by a small stitch at its end: five or six round a centre make a daisy.
- Whipped chain: A second thread wrapped through the loops makes a raised, corded line.
- Chain stitch filling: Rows of chain stitch worked close together, following the shape, fill it with texture.
Compare
Use chain stitch for a bold, textured line that looks hand-drawn; use backstitch for a fine, crisp one. Backstitch
In a Hoopsake pattern
Hoopsake turns your photo into a hand-embroidery pattern with a real stitch plan: it chooses a stitch such as chain stitch for every line, matches each colour to a DMC thread and gives you a guide to print. Make a pattern from a photo
Names and history
Chain stitch is also called tambour stitch, though tambour work is strictly done with a hook through fabric stretched on a frame. A single loop held by one small stitch is detached chain, better known as lazy daisy.
Questions
Why are my chain stitch loops uneven?
Usually the stitch lengths vary, or the thread has twisted. Keep the stitches even and let the needle dangle now and then so the thread untwists.
How do I end a line of chain stitch?
Take the needle down just past the last loop, over its end, to make a small holding stitch, then secure the thread on the back.
What is the difference between chain stitch and lazy daisy?
Lazy daisy (detached chain) is a single chain loop held by its own small stitch; chain stitch links the loops into a line.
How many strands for chain stitch?
Two or three strands make a neat line; six make a heavy, rope-like one.